
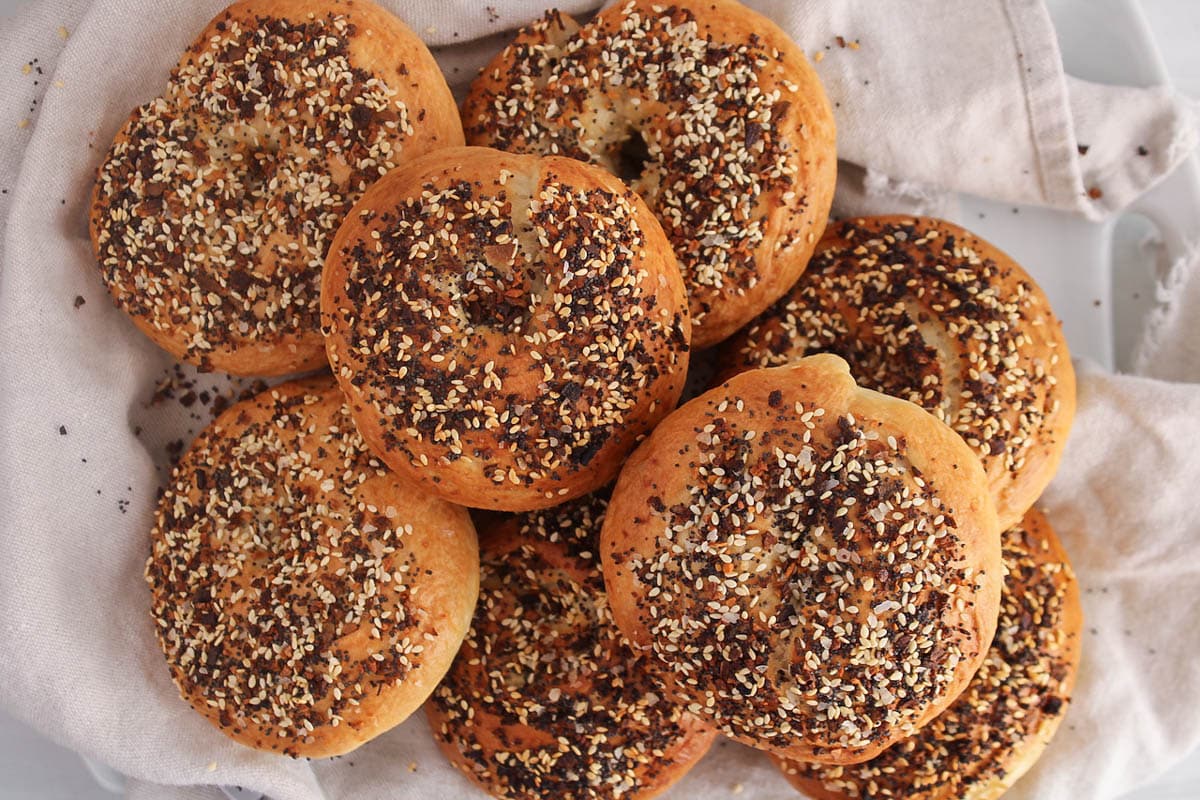
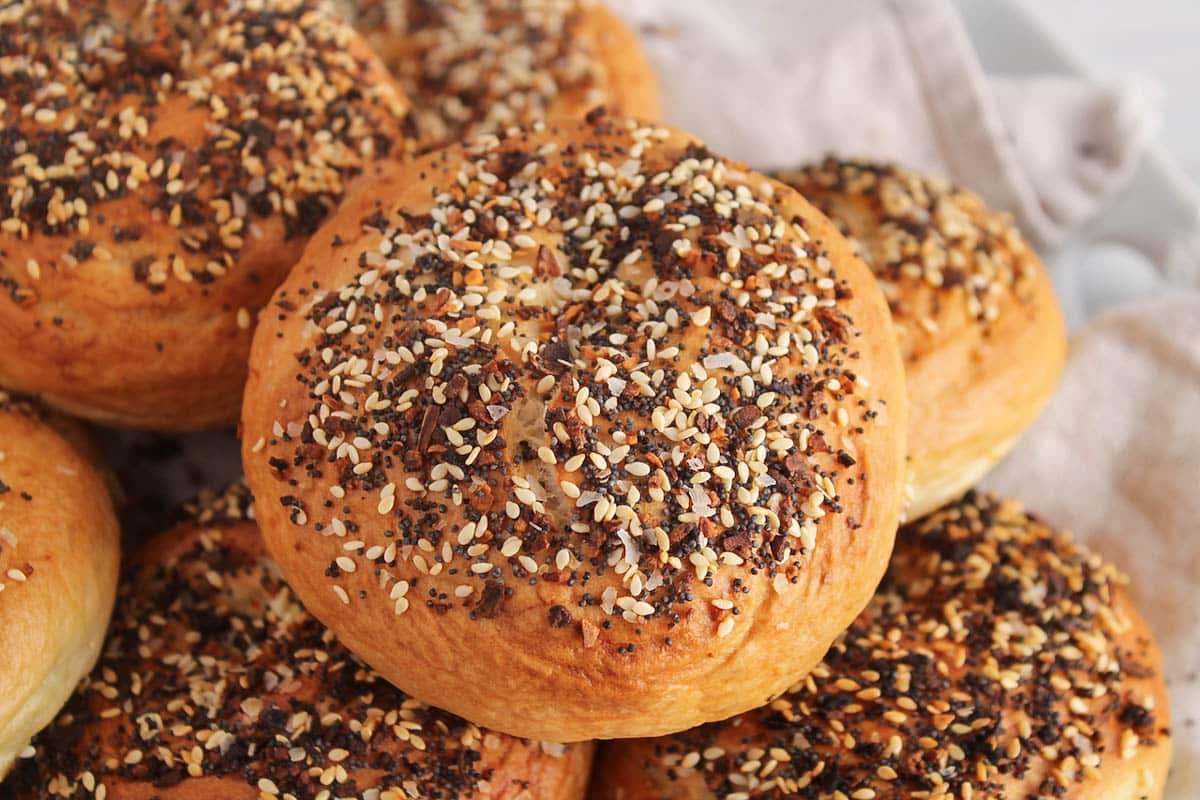
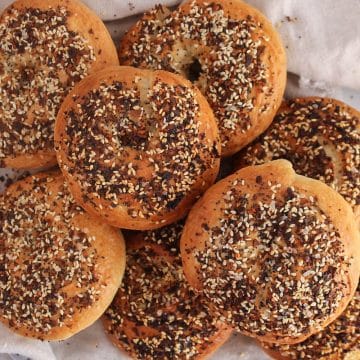
These homemade sourdough discard bagels are delicious, perfectly chewy and easier to make than they seem. You will love how fast they are to make, (all done in one day!) and you can personalize them by using different topping ingredients. Such an amazing bread recipe to use your extra sourdough discard!
Next time you have extra sourdough discard from feeding your active starter, do not throw it away and make sourdough discard bagels instead!
There are lots of homemade bread recipes we love to make using sourdough discard, especially when we want quick bread done on the same day. These sourdough discard English muffins and this sourdough discard sandwich bread are perfect for when you need something fast, easy and delicious. Or try these sourdough discard pretzels for game night or for fun snacks.
But there is nothing better than homemade bagels made from scratch! These bagels call for sourdough discard for extra flavor and to add a yummy tenderness to the bagels, but the recipe also includes some dry active yeast to speed up the rising process.
They make for a fun weekend bake idea to use for quick breakfast or lunches to go on a busy week.
Let me know how they turned out! ❤️
Jump to:
❤️ Why you will love this recipe
- Sourdough bagels: Amazing recipe to use your extra sourdough discard, but can also be made using active sourdough starter!
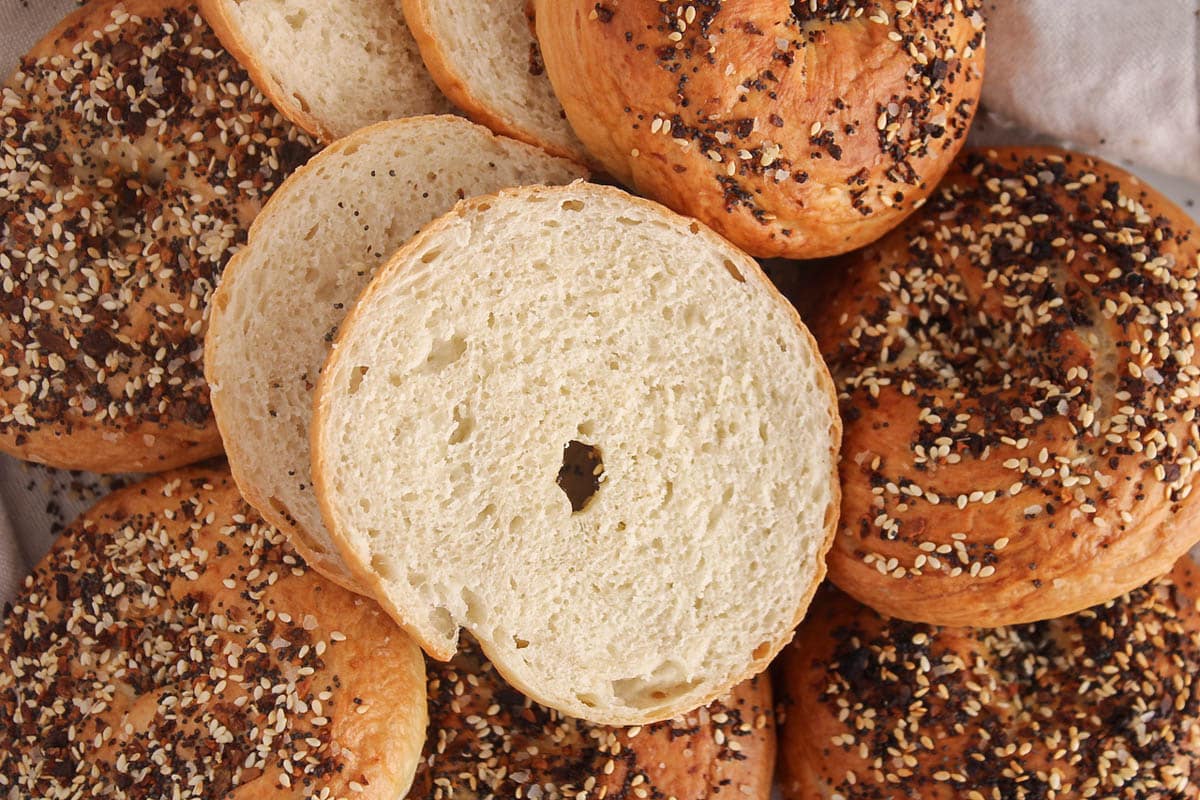
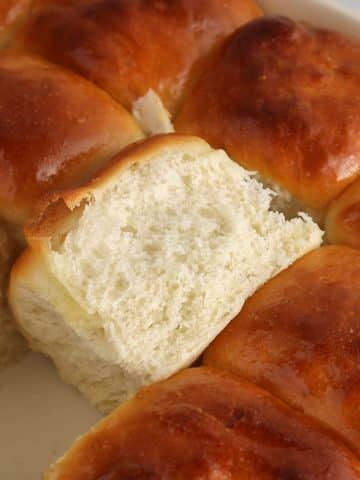
- Delicious: Flavorful, soft yet chewy homemade bagels.
- Quick bread: Fast, same-day recipe with most of the time being spent rising the dough.
- Store well: they stay fresh on the counter for days, and you can make a big batch and freeze them!
- Versatile: Customize your bagels and garnish them with your favorite toppings!
🗒 Ingredient notes (+ substitutions)

- Sourdough discard: you can either use sourdough discard from your fridge or active sourdough starter, both work well.
- Dry active yeast: using sourdough discard means that a leavening agent is required, and here we are using some extra yeast. I used dry active yeast (from a jar that you keep in the fridge), but you can also use instant yeast.
- Flour: I recommend using bread flour to give the bagels a nice chewy bite, although all-purpose flour should work too.
- Milk (for brushing): to make these bagels vegan, I used oat milk. You can use any kind of milk you want, as long as it is unsweetened and unflavored!
⭐️ Full list of ingredients (+ quantities) down below in the recipe card!
📝 Variations
- Toppings: we love everything seasoning for bagels, but try white sesame seeds, poppy seeds, salt, dried herbs or leave them plain!
- Shape: this recipe makes 8 large bagels, but you can make 12-20 mini bagels with the dough if you prefer! In this case, you will need to bake them for a slightly shorter time.
- Sourdough: as mentioned above, you can use either the sourdough discard or active sourdough starter to make it.
🍽 How to make sourdough discard bagels
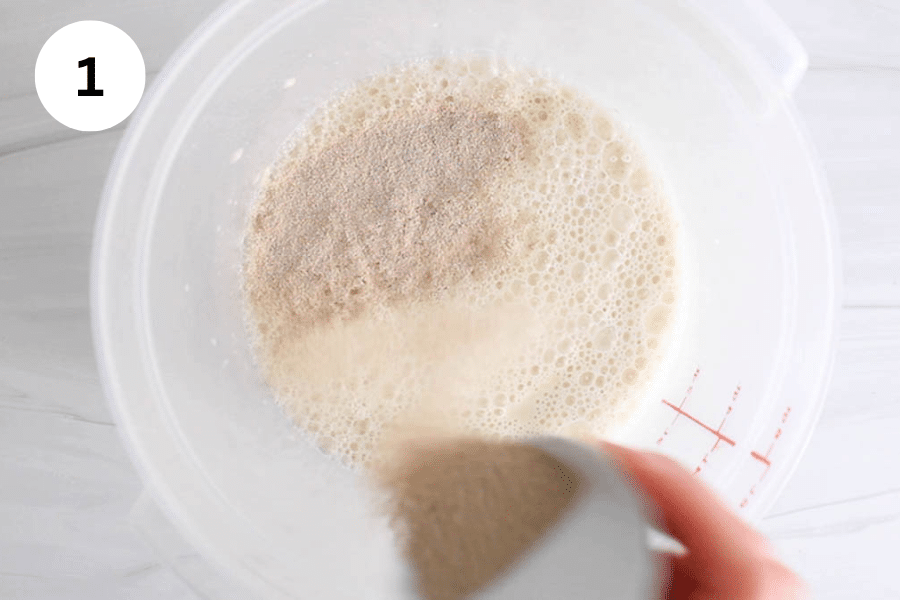
Step 1: In a large bowl or container, add the sourdough discard, water and maple syrup, then stir to combine. Sprinkle the dry active yeast over and let it sit for about 5 minutes before mixing again.
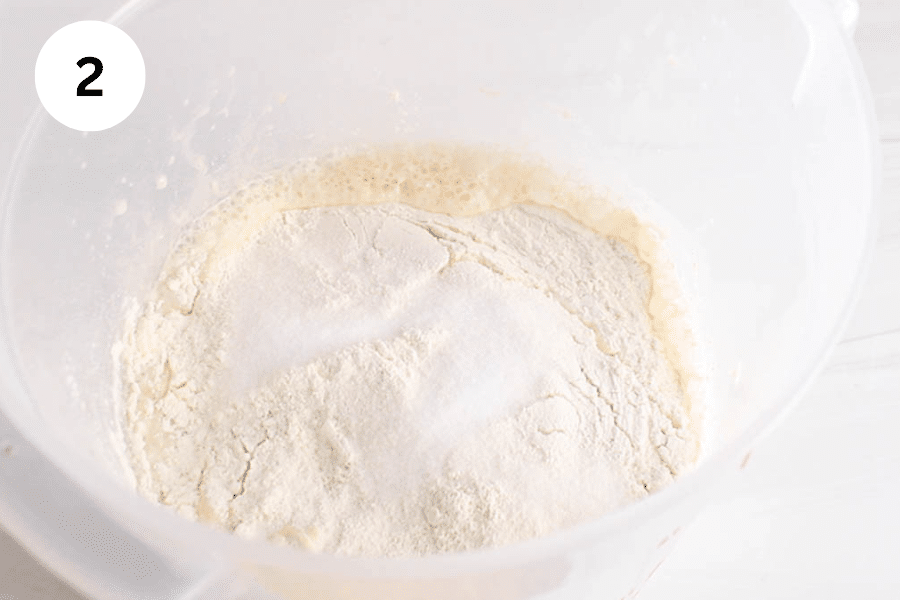
Step 2: Add the flour and salt.
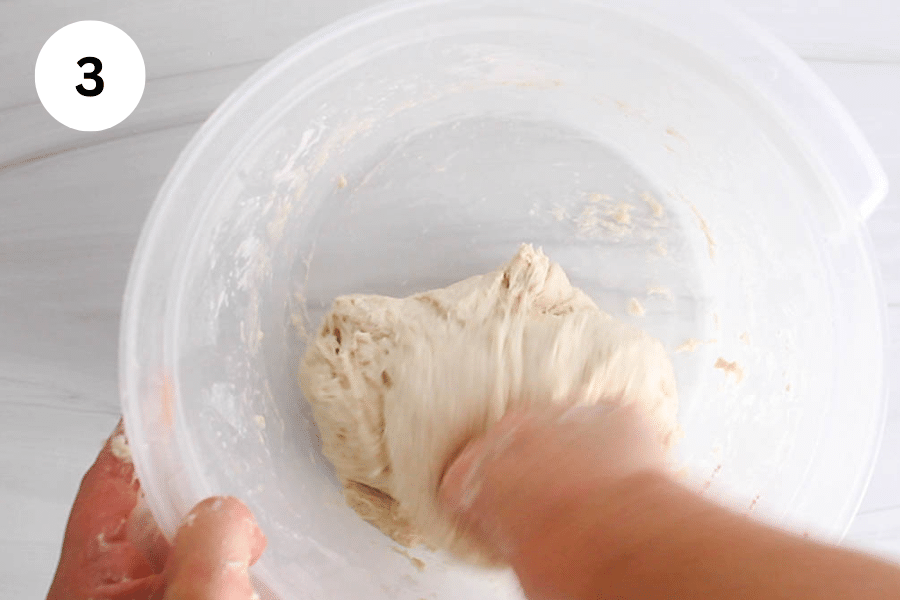
Step 3: Mix until it forms a shaggy dough. I like to start with my dough whisk, then use my hands.
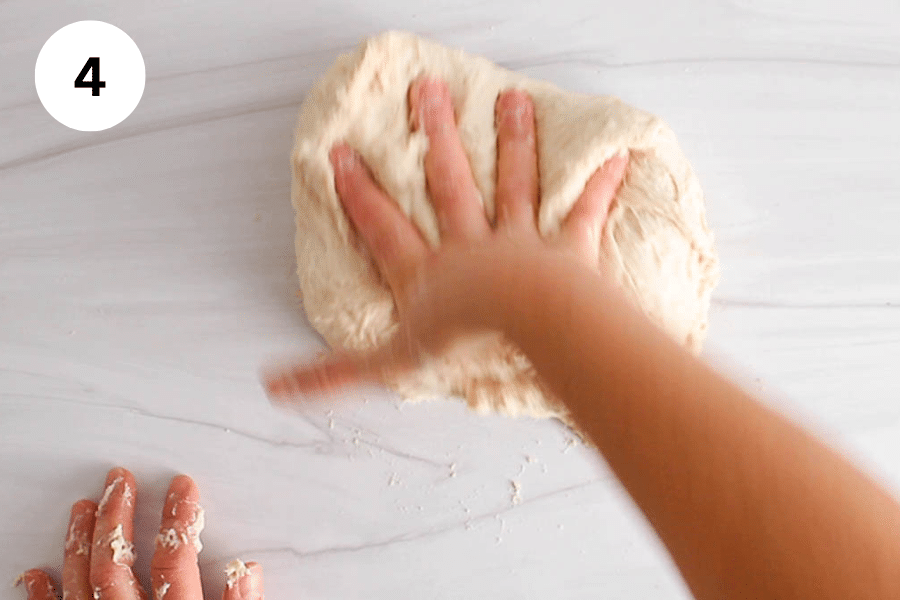
Step 4: Transfer the dough to a clean surface (no flour) and knead until smooth, about 5 minutes.
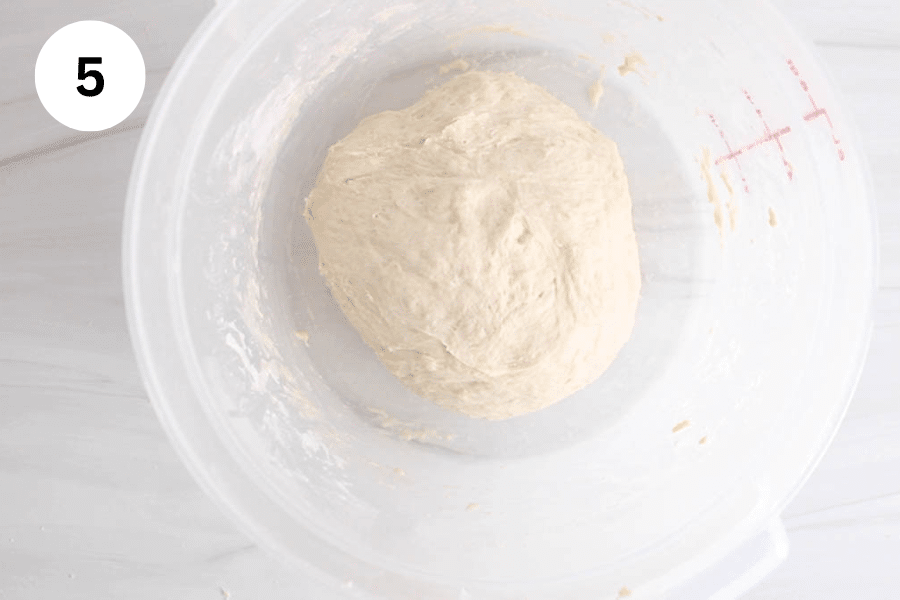
Step 5: Transfer the kneaded ball of dough back to the container or bowl, cover and let it rise for 1-2 hours in a cozy area.
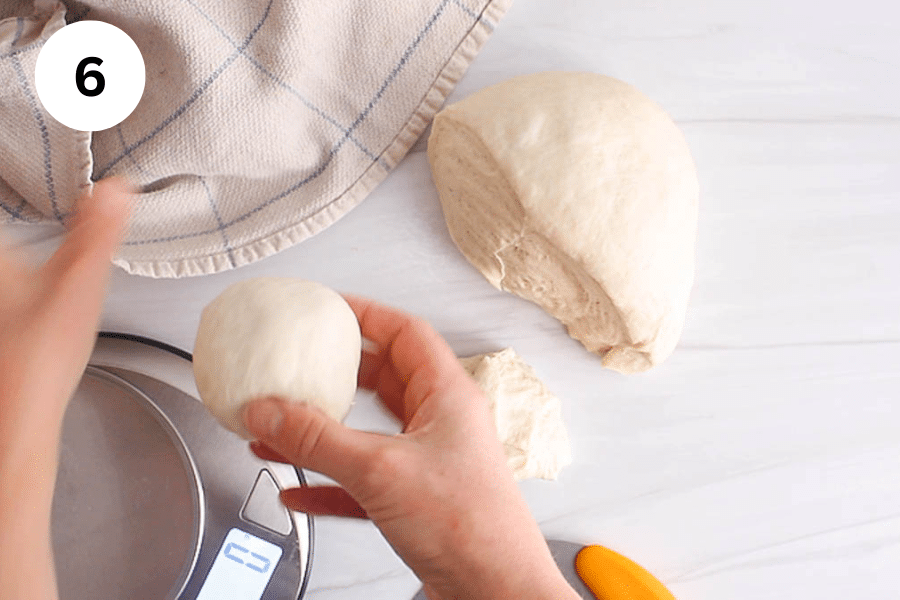
Step 6: Divide the dough into 8 equal portions (you can use a scale to help you or eyeball it, both are fine). Shape into 8 balls and keep them covered as you work so they don't dry out.
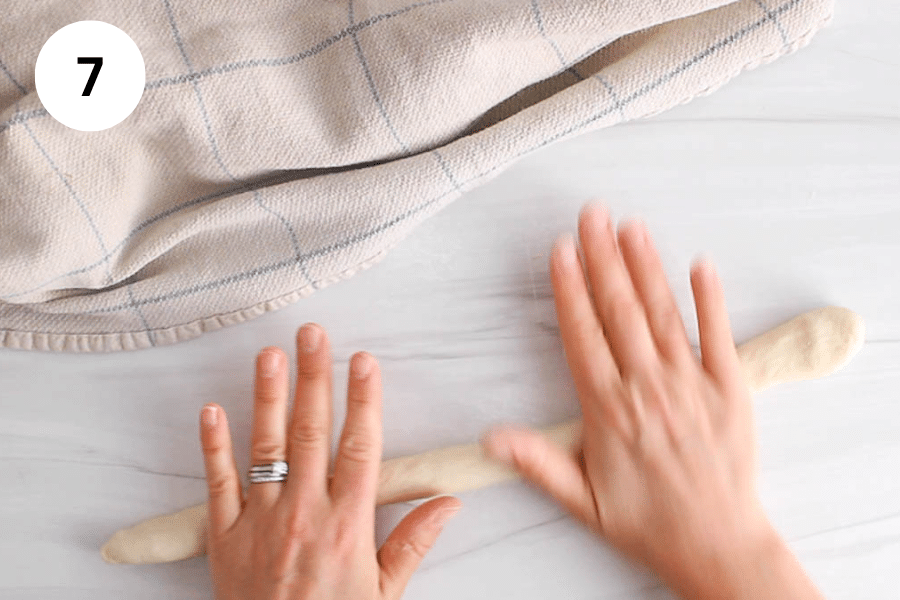
Step 7: One by one, roll the balls of dough into a long tube of about 6 inches long.

Step 8: Then, join both extremities and squeeze the tips of the dough together to close the ring. Transfer over a parchment paper-covered baking sheet as you go.
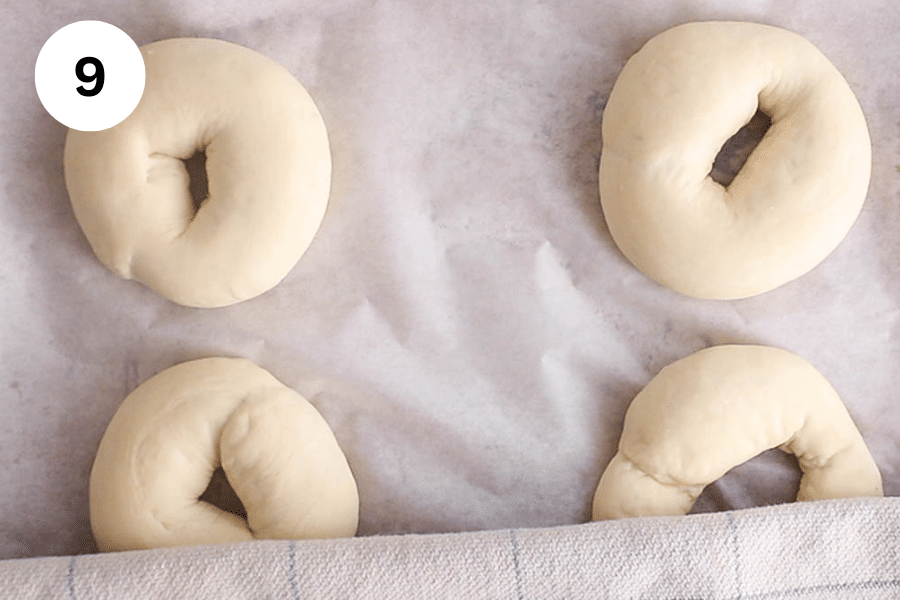
Step 9: Cover the bagels with a towel and let them rise once more for about 30-45 minutes.
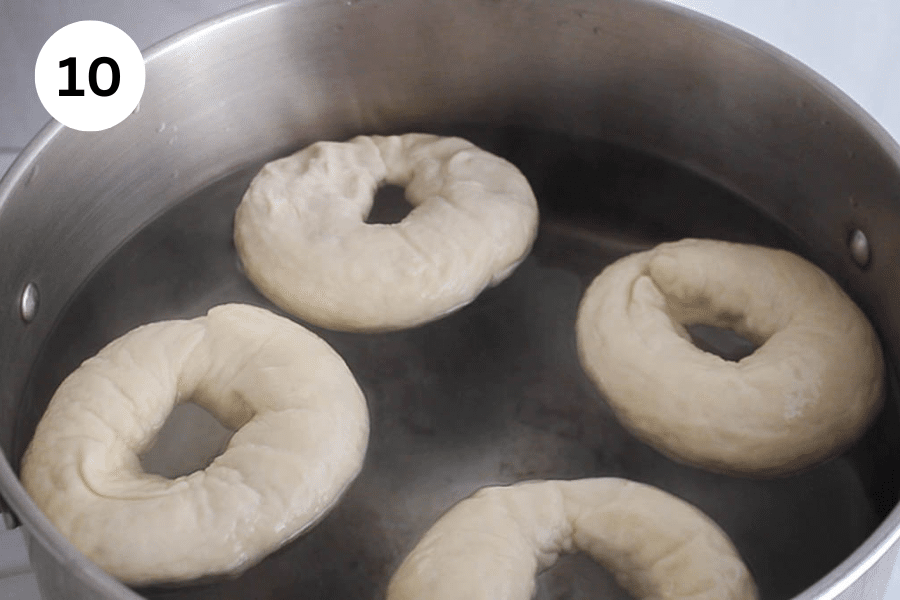
Step 10: Meanwhile, bring a large pot of water to a boil. When the bagels are done rising, then boil them for 30-60 sec on each side (you will have to work in 2-3 batches). Use a slotted spoon to transfer them back over the baking sheet and pat them dry to remove any excess water.
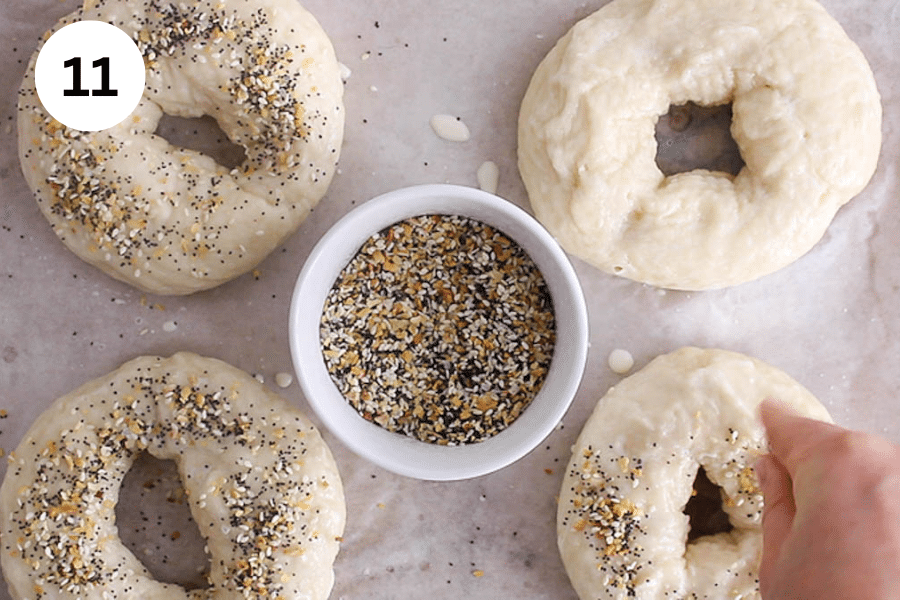
Step 11: Brush with some milk (I used oat milk) and cover with your garnishing ingredient of choice (I used everything seasoning).
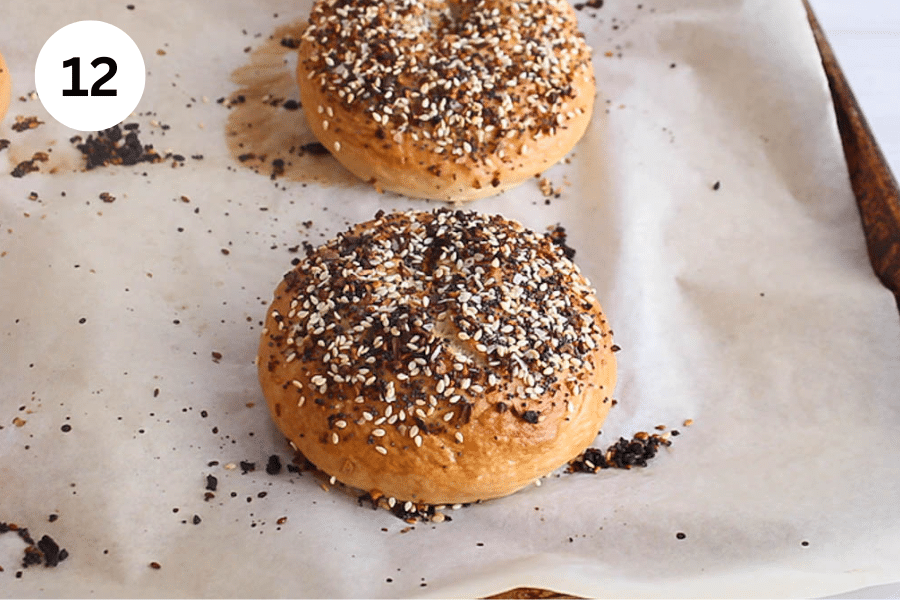
Step 10: Bake at 425ºF for 20-25 minutes. Watch carefully and loosely cover with foil towards the end if the bagels are browning too fast.
⭐️ Detailed recipe (+ video) down below in the recipe card!
💡 Baking tips
- Make sure your dry active yeast is fresh and still active; it should create some foam after resting over the liquid (see video).
- Knead the dough until it is smooth and no longer sticky, and avoid adding flour to your counter. This kneading step can take a whole 5 minutes (especially since bagel dough is low-hydration, meaning that you really have to work the dough)!
- Test your bagels: When you transfer one of the bagels to the pot of boiling water, it should be floating right away. This means that the dough is light and filled with pockets of air. If the bagel is not floating, then let the other ones rise for a little longer to give them a chance to puff a little more.
- The longer you boil the bagels, the thicker/brown the crust will be. I like to do 30-45 seconds, but you can boil for a little more for a chewier crust. Put a timer on!
- Make sure to pat dry the dough after boiling, or the bagels might stick to the parchment paper.
- For lighter colored bagels, cover them loosely with a piece of foil halfway through baking.
❗️ Storing tips
Let the bagels completely cool down, then transfer to an airtight container and keep at room temperature for up to 3-4 days. I like to slice and toast the bagels before enjoying, or you can very briefly warm them using the microwave (only 10-15 seconds) to make them softer.
For longer storage, freeze them and try to enjoy them within 3 months. You can thaw them at room temperature or use the microwave to speed up the thawing process.
❓ FAQs
You might not have allowed enough time for the dough to rise. To help rise the dough, place it in a cozy spot and allow for enough time, it should double in size. Once you shape the bagels, let them rise a second time on the baking sheet before you boil them. Also, double-check the expiration date on the jar of your active yeast to make sure it is fresh enough for making bread!
If you don't allow enough time for the bagel to rise and puff, they might end up being too flat (or dense). Also, this is meant to be a dough that's lower in hydration, so resist adding more water while you mix/knead (too much hydration can create flat bagels).
Yes! In that case, you can keep mixing the dough (with the dough hook, speed 2) for 5-7 minutes instead of kneading the dough on the counter.
🍞 More vegan sourdough discard breakfast recipes


I hope you like this sourdough discard bagel recipe as much as we do! If you try it, please leave a comment below and rate the recipe to let me know how it was. Your feedback is so helpful!
Let's stay in touch with Instagram, Pinterest and Facebook. Also, don't forget to subscribe to my newsletter to be sure not to miss anything.
📖 Recipe
Sourdough Discard Bagels
Equipment
- Large bowl or container
- Baking sheet (+ parchment paper)
- Large pot
- Slotted spoon (optional)
Ingredients
- 150 g sourdough starter (150g = about ⅔ cup)
- 270 g room temperature water (270g = about 1 cup + 2 tablespoons)
- 40 g maple syrup (40g = about 2 tablespoons)
- 10 g active dry yeast (10 g = about 3 teaspoons)
- 500 g bread flour (500g = about 4 cups, do not over pack the cups, use the spoon and level method)
- 15 g salt (15 g = about 2.5 teaspoons)
Instructions
- Mix the dough: In a large bowl or container, add the sourdough discard, water and maple syrup, then stir to combine. Then, sprinkle the dry active yeast over and let it sit for about 5 minutes before mixing again. Add the flour and salt, and mix until it forms a shaggy dough. I like to start with my dough whisk, then use my hands.
- Knead and rise: Transfer the dough to a clean surface (no flour) and knead until smooth, about 5 minutes. Transfer the kneaded ball of dough back to the container or bowl, cover and let it rise for 1-2 hours in a cozy area. It should double in size.
- Shape: Divide the dough into 8 equal portions (you can use a scale to help you or eyeball it, both are fine). Shape into 8 balls and keep them covered as you work so they don't dry out. One by one, roll the balls of dough into a long tube of about 6 inches long. Then, join both extremities and squeeze the tips of the dough together to close the ring. Transfer over a parchement paper covered baking sheet as you go. Cover the bagels with a towel and let them rise once more for about 30-45 minutes. They should puff nicely.
- Boil and garnish: Meanwhile, bring a large pot of water to a boil. When the bagels are done rising, then boil them for 30-60 sec on each side (you will have to work in 2-3 batches). Use a slotted spoon to transfer them back over the baking sheet and pat them dry to remove any excess water. Brush with some milk (I used oat milk) and cover with your garnishing ingredient of choice (I used everything seasoning).
- Bake: Bake at 425ºF for 20-25 minutes. Watch carefully and loosely cover with foil towards the end if the bagels are browning too fast.
Video
Notes
- Make sure your dry active yeast is fresh and still active; it should create some foam after resting over the liquid (see video).
- Knead the dough until it is smooth and no longer sticky, and avoid adding flour to your counter. This kneading step can take a whole 5 minutes (especially since bagel dough is a low-hydration dough, meaning that you really have to work the dough)!
- Test your bagels: When you transfer one of the bagels to the pot of boiling water, it should be floating right away. This means that the dough is light and filled with pockets of air. If the bagel is not floating, then let the other ones rise for a little longer to give them a chance to puff a little more.
- The longer you boil the bagels, the thicker/brown the crust will be. I like to do 30-45 seconds, but you can boil for a little more for a chewier crust. Put a timer on!
- Make sure to pat dry the dough after boiling, or the bagels might stick to the parchment paper.
- For lighter colored bagels, cover them loosely with a piece of foil halfway through baking.
- Nutrition: please note that the nutritional information is an estimate per serving provided for informational purposes only (calculated by software) and accuracy is not guaranteed. Consult with your healthcare provider or a registered dietitian if you need precise nutrition calculations for health reasons.


Leave a Reply