
This delicious chocolate chip sourdough bread makes for such a fun treat if you love to make naturally fermented bread using a sourdough starter. It is chewy, perfectly sweet, and filled with dark chocolate chips. Makes for an amazing homemade sourdough bread for breakfast, snacking or even to enjoy as a light dessert. And kids love it!

Here is a really delicious sourdough bread recipe for when you want to try something different and a little sweet: chocolate chips sourdough bread!
It requires basic sourdough bread ingredients, such as active sourdough starter and bread flour, but with the addition of dark chocolate chips. It is SO GOOD!
I make this rustic sourdough bread or this same-day white sourdough boule every week, and sometimes this savory everything bagel sourdough bread for breakfast, but when we feel like something sweet and dessert-like, then this chocolate chip sourdough boule is my go-to. It is a cross between these sourdough discard chocolate chip muffins and this double chocolate sourdough bread, but it has more of a classic bread texture to it, making it perfect for morning toast.
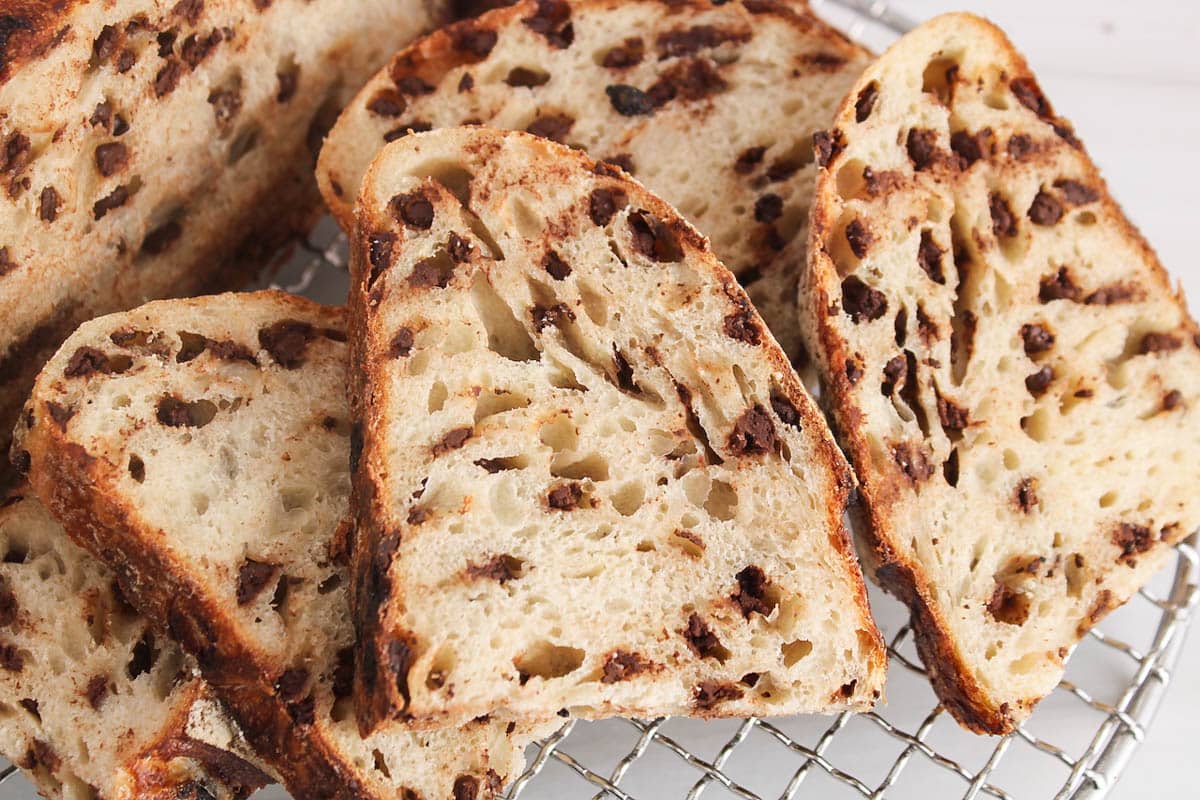
The crumb is nicely chewy and soft, plus studded with just the perfect amount of sweet chocolate chips. Warm up before serving, and smother some butter over, it is pure comfort food. This is definitely one of my family's favorite recipes, you should give it a try!
Let me know if you give it a try! ❤️
Looking for a sweet breakfast sourdough recipe? Check out this maple sourdough bread and this blueberry sourdough bread!
Jump to:
❤️ Why you will love this recipe
- Simple and easy sourdough bread recipe
- Packed with delicious sweet dark chocolate chips
- Chewy yet soft crumb, with an amazing golden crunchy crust
- Perfect for breakfast, but can also be enjoyed as a dessert
- A favorite sourdough bread recipe for kids!
🗒 Ingredient notes (+ substitutions)
- Active sourdough starter: you will need a very bubbly and active sourdough starter (100% hydration) for making this bread. This means that you will need to plan ahead and feed your starter about 4-6 hours before you need it to ensure peak activity. The starter is ready to use when it has at least doubled in height in your jar.
- Water: you can use room temperature water, or warm water of about 27-29ºC, to help boost the activity of the wild yeast, making the fermentation process faster.
- Bread flour: higher in protein compared to all-purpose flour, it is a good choice in sourdough baking to help build up the strength of the gluten.
- Salt: fine sea salt works well
- Chocolate chips: I prefer using mini chocolate chips so they distribute nicely over the crumb of the bread, but you can use any kind that you like.
⭐️ Detailed list of ingredients (+ quantities) down below in the recipe card!
Variations
- Flavoring: feel free to add some vanilla extract (about 1 tsp) or some maple syrup (about 2 tbsp) if you would like your bread to be sweeter.
- Types of chocolate: you can use bitter-sweet dark chocolate or milk chocolate, whatever works for your family. We love these dairy-free mini dark chocolate chips from Enjoy Life
- Double chocolate sourdough bread: check out this dark chocolate loaf of sourdough!
- Inclusions: for a nice crunch, add some chopped walnuts or pecans when adding the chocolate chips.
🍽 How to make chocolate chip sourdough bread
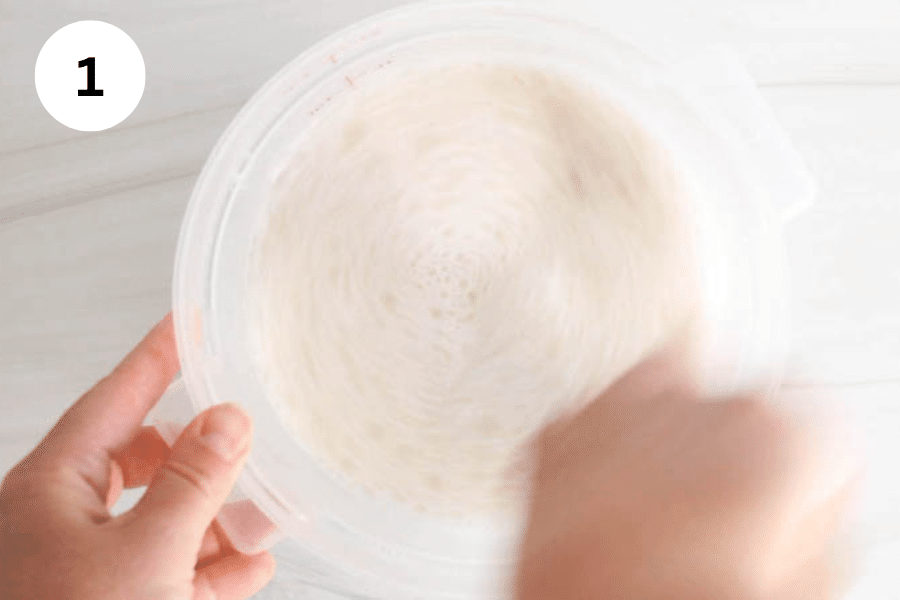
Step 1: Add the sourdough starter and water to a large mixing bowl or container, then stir until uniform.
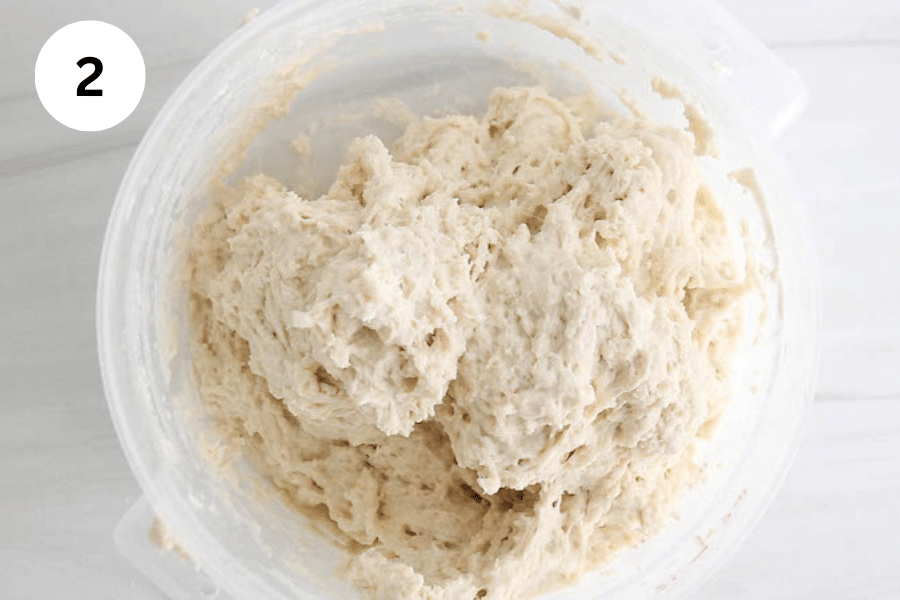
Step 2: Add the bread flour and salt, and keep mixing until a shaggy dough forms. Cover and let the dough rest for about 20 minutes.
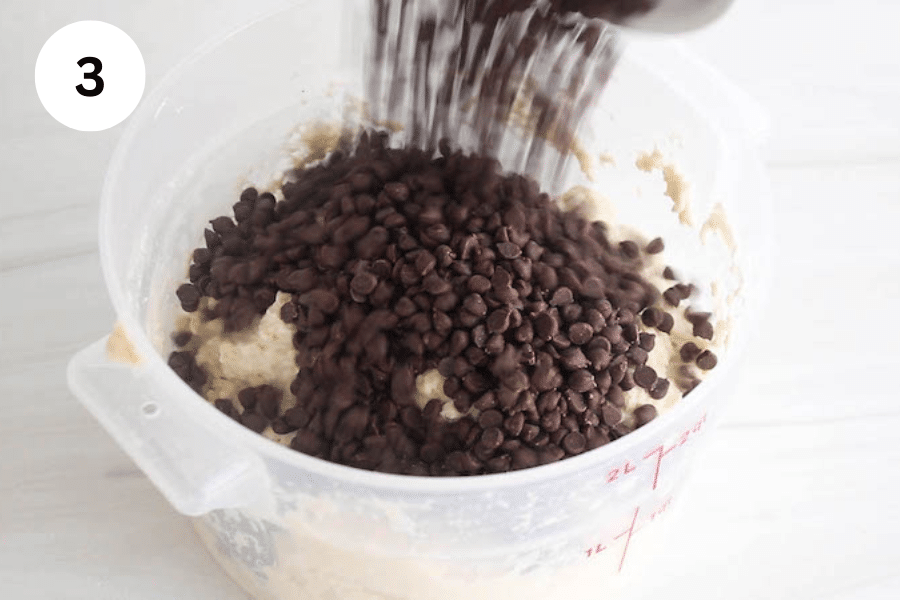
Step 3: Add the chocolate chips to the dough
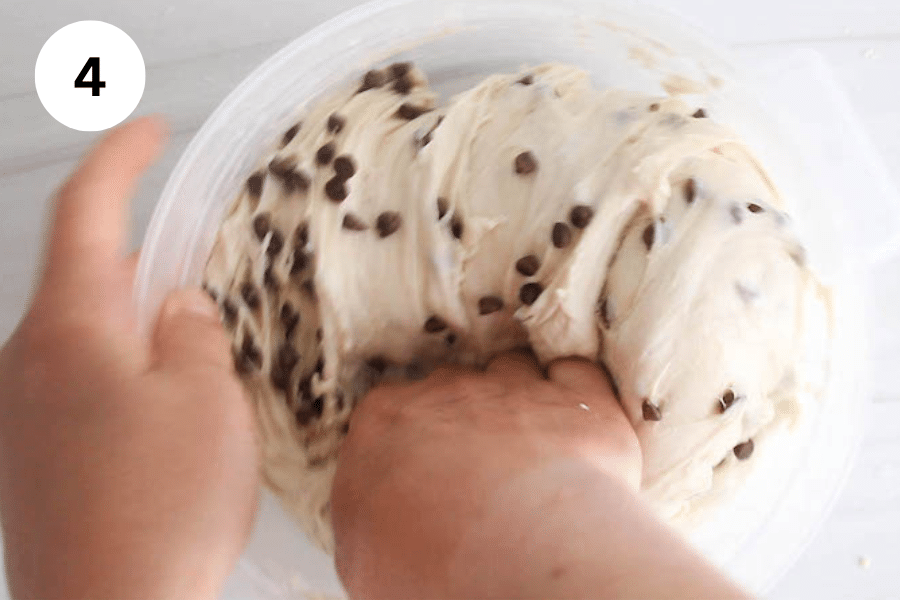
Step 4: Perform stretches and fold right into the bowl every 30 minutes, 3 times, covering well in between. The chocolate chips should be incorporated into the dough as you do the stretches and folds. Then, cover and let the dough ferment for 5-8 hours. The dough should become bubbly and rise in your container, although not quite doubled.
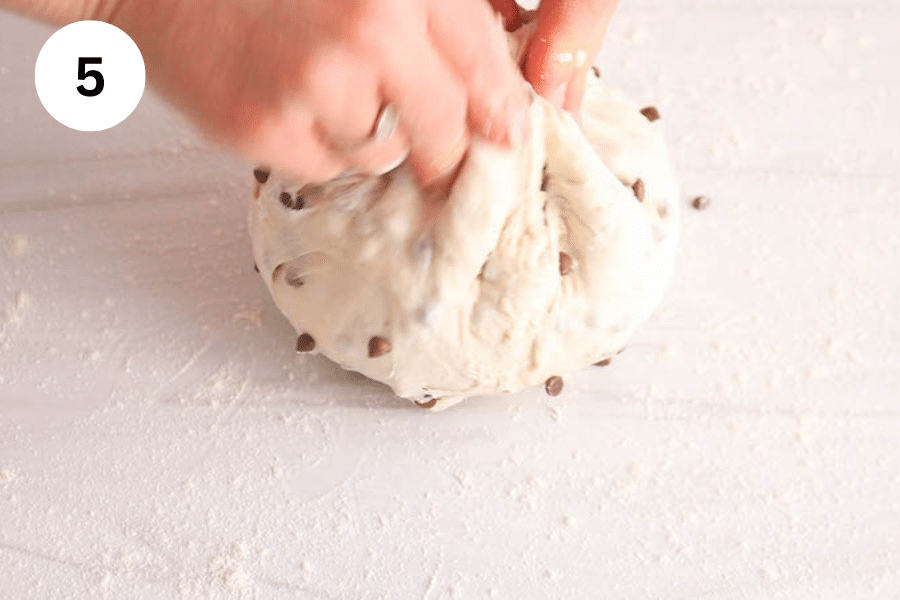
Step 5: Lightly cover a clean surface with some flour, and transfer the fermented dough over. Roughly pre-shape into a ball by grabbing/pulling on the corners of the dough to bring them back in the middle (this should look like a large dumpling!). Flip the ball, cover it (you can just flip your bowl over) and let the ball of dough rest for 20 minutes.
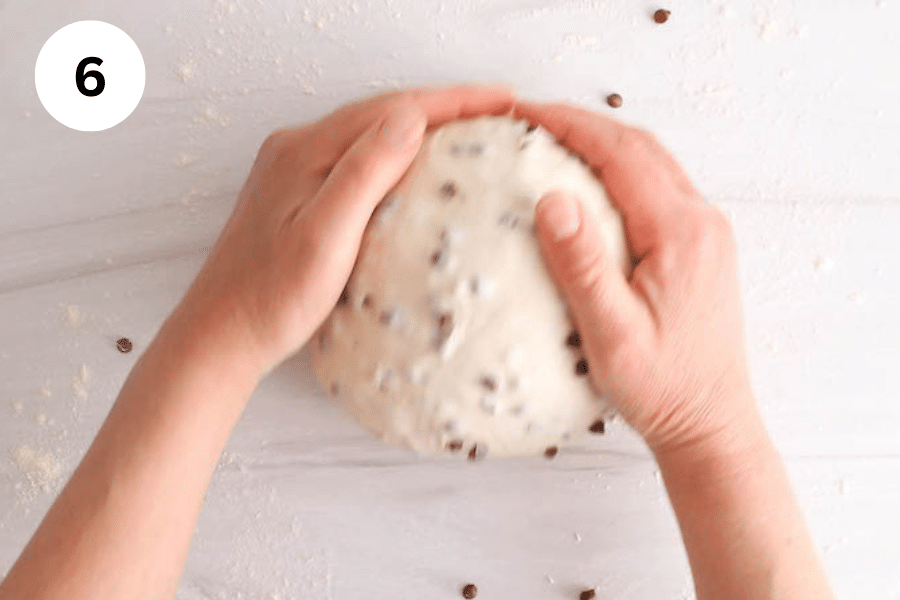
Step 6: Shape into a boule (see video at the end of the recipe card). Once done, use both your hands to grab the top part, then gently push it towards you while allowing the dough to drag on the counter (do not use too much flour so there is some tension when dragging). Keep going until the dough forms a nice boule with a tight surface.
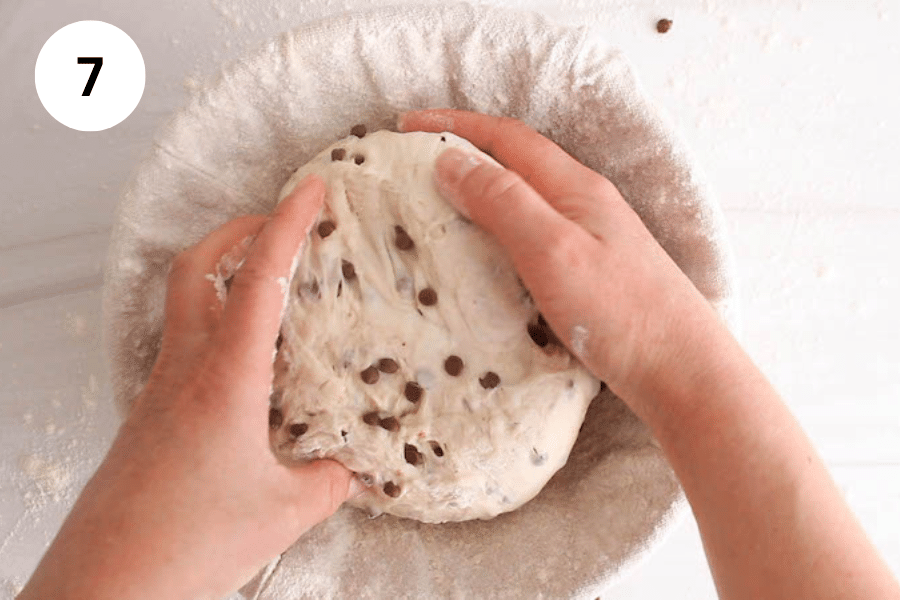
Step 7: Transfer the dough to a banneton (flip the boule so the smooth top part is under). Cover with cling and transfer to the fridge overnight (or for at least 3 hours).
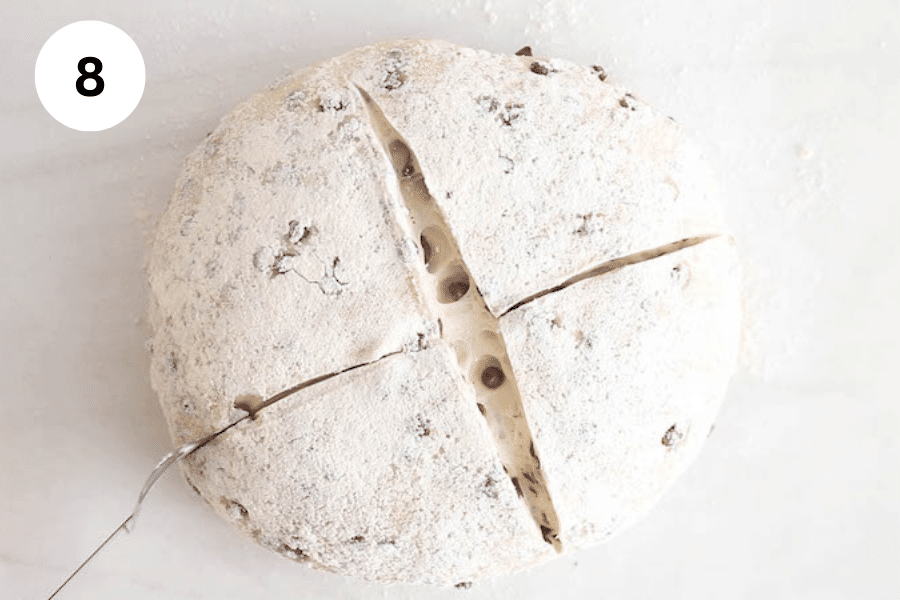
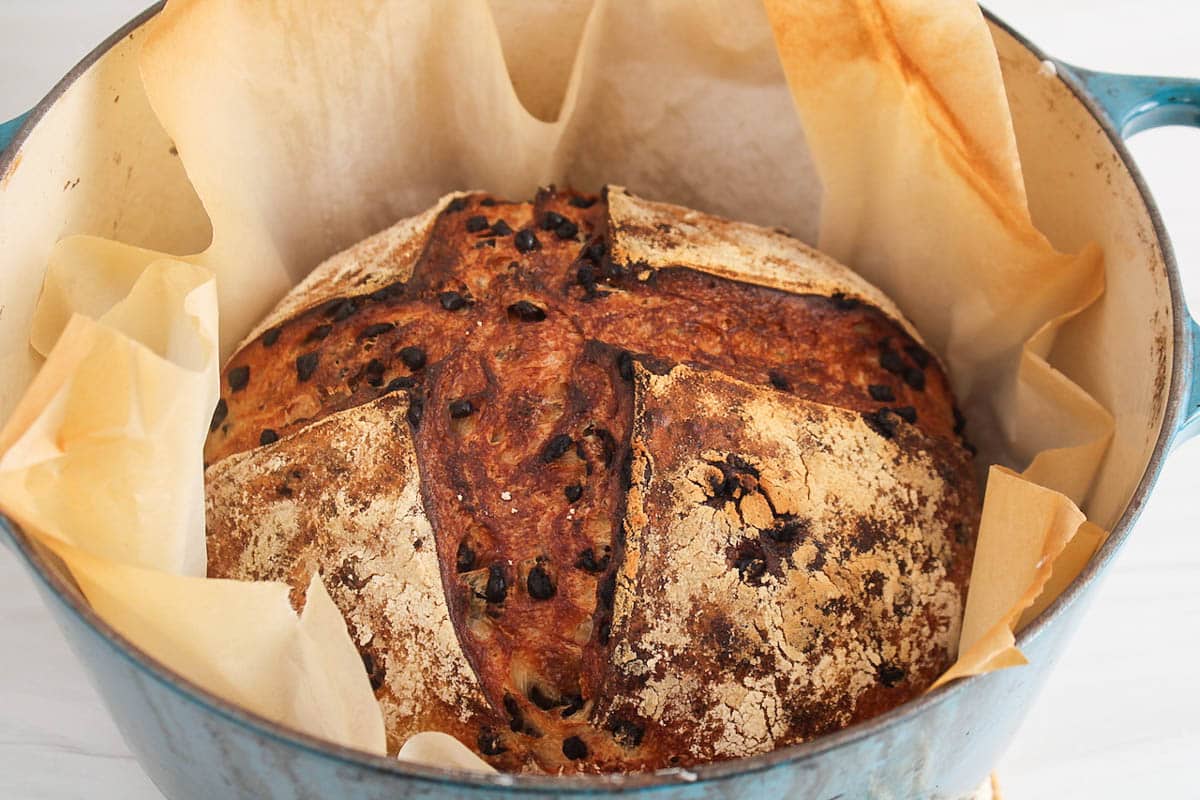
Step 8: Transfer a Dutch Oven cast-iron dish with the cover on to your oven and pre-heat to 450ºF until very hot (or at least 20-30 minutes). When ready to bake, take the banneton out of the fridge and flip it over a large square of parchment paper. Score the dough as you wish.

Step 7: Transfer it to the Dutch oven by pulling on the corner of the paper. You can add a few ice cubes between the parchment paper and the sides of the Dutch oven (it creates more steam and helps with rising the bread). Cover and bake for 30 minutes. Then, uncover and bake for another 5 minutes.
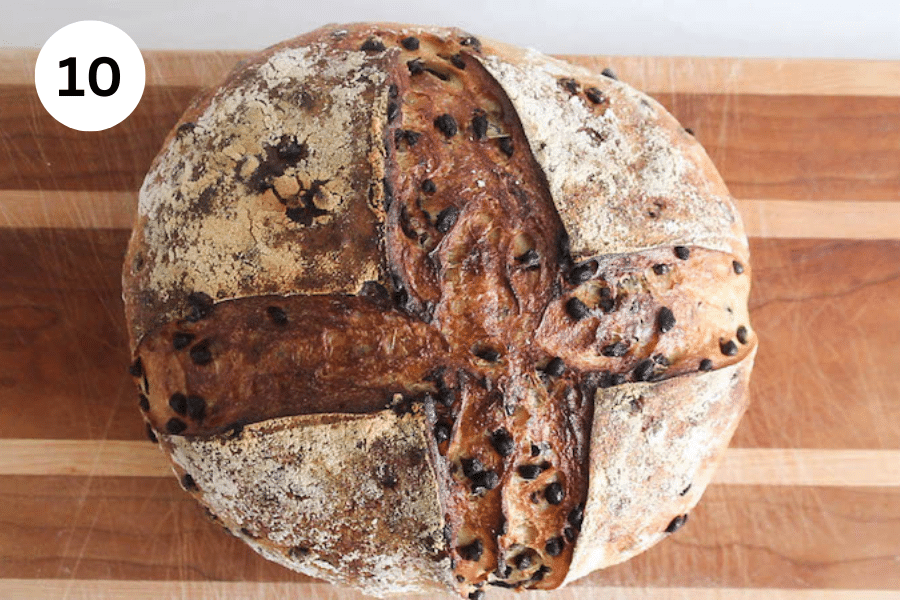
Step 8: Once done baking, transfer to a cooling rack or a cutting board and let the bread cool down completely before slicing.
⭐️ Detailed recipe (+ video) down below in the recipe card!
✅ Baking tips
- It is essential to use a fed, bubbly and active sourdough starter when mixing the dough ingredients so the bread can rise and ferment properly. I recommend feeding your starter about 4-8 hours prior to making the dough. I usually feed my starter early in the morning and make my dough after lunchtime, but if you are not at home during the day, then feed the starter the night before and make your dough the next morning. Then it can ferment during the day.
- The tricky part of making sourdough bread is knowing when the bulk fermentation is done since it varies depending on the ambient temperature. Usually, I let my sourdough ferment for about 5-7 hours. If your dough is colder and/or your house is chilly, then you might need to ferment for longer. A subjective way to know when it is ready is that the dough should be bubbly, become wiggly if you shake the container and it has risen in the dish.
- To help my bread rise when baking (called the oven spring), I like to place a few ice cubes between the Dutch oven and the parchment paper. This creates a little extra steam that helps keep the crust softer for longer while baking, promoting a better rise of the loaf.
❗️ Storage tips
Because of its naturally sour crumb, sourdough bread stores well. Ideally, you would slice only what you need, then flip the bread on a cutting board with the sliced part down. Keep it that way for up to 1-2 days, depending on how dry your house is.
For longer storage, you can transfer the bread to an airtight container so it does not dry out too fast, although this will soften the crust.
You can also freeze it! In that case, pre-slice the whole loaf for easy grab-and-go and thaw on the counter for a few hours or reheat using a toaster oven.
This guide on how to store sourdough bread will help you keep your sourdough bread fresh for longer!
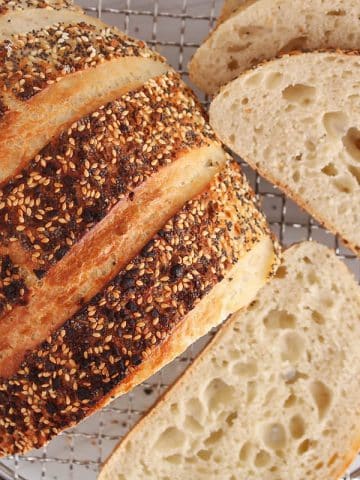
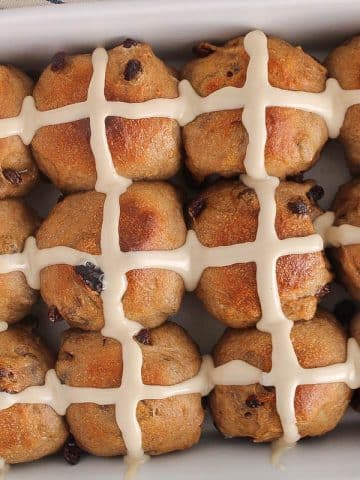
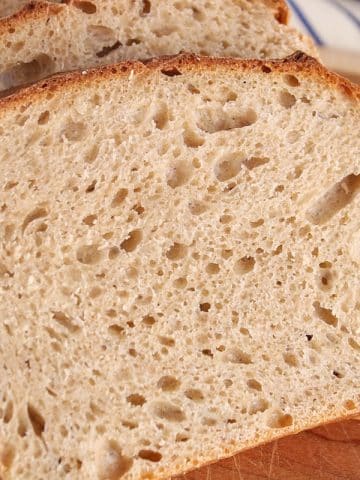
🍞 More sourdough bread recipes to try


I hope you enjoyed this chocolate chip sourdough bread recipe! If you have any questions, please leave them in the comment section below. Your feedback is so helpful!
Let's stay in touch with Instagram, Pinterest and Facebook. Also, don't forget to subscribe to my newsletter to be sure not to miss anything.
📖 Recipe
Chocolate Chip Sourdough Bread
Equipment
- Large mixing bowl or container (with cover)
- Blade (for scoring)
- Banneton
- Dutch oven (with parchment paper)
Ingredients
- 100 g active sourdough starter 100% hydration
- 350 g water
- 500 g bread flour
- 10 g salt
- 200 g chocolate chips
Instructions
- PREP THE STARTER: about 4-8 hours before you want to make the dough, feed your starter. You can use it when it has at least doubled in height in your jar. I usually feed my starter later in the evening so I can make the dough early the next morning.
- MAKE THE DOUGH: add the sourdough starter and water to a large mixing bowl or container, then stir until uniform. Add the bread flour and salt, and keep mixing until a shaggy dough forms. Cover and let the dough rest for about 20 minutes.
- ADD CHOCOLATE CHIPS + STRETCHES AND FOLDS: Add the chocolate chips over the dough and perform stretches and fold right into the bowl every 30 minutes, 3 times, covering well in between. The chocolate chips should be incorporated into the dough as you do the stretches and folds.
- BULK FERMENTATION: Cover and let the dough ferment for 5-8 hours, depending on the temperature of your house. The dough should become bubbly and rise in your container, although not quite doubled.
- PRE-SHAPE: Lightly cover a clean surface with some flour, and transfer the dough over. Roughly pre-shape into a ball by grabbing/pulling on the corners of the dough to bring them back in the middle (this should look like a large dumpling!). Flip the ball, cover it (you can just flip your bowl over) and let the ball of dough rest for 20 minutes.
- SHAPE: Uncover and flip the dough again, then gently stretch the dough into a square/rectangular shape. Fold the top part up to the middle, then fold each side one over the other one, then grab the top part and roll the dough into a tight ball. Then, use both your hands to grab the top part, then gently push it towards you while allowing the dough to drag on the counter (do not use too much flour so there is some tension when dragging). Slightly rotate the ball and repeat. Keep going until the dough forms a nice boule with a tight surface (KEEP SCROLLING TO WATCH THE VIDEO).
- COLD PROOF: Transfer the dough to a banneton (flip the boule so the tight top part is under). Cover with cling and transfer to the fridge overnight (or for at least 3 hours).
- BAKE: Transfer a Dutch Oven cast-iron dish with the cover on to your oven and pre-heat to 450ºF until very hot (or at least 20-30 minutes). When ready to bake, take the banneton out of the fridge and flip it over a large square of parchment paper. Score the dough as you wish, then transfer it to the Dutch oven by pulling on the corner of the paper. You can add a few ice cubes between the parchment paper and the sides of the Dutch oven (it creates more steam and helps with rising the bread). Cover and bake for 30 minutes. Then, uncover and bake for another 5 minutes. Once done baking, transfer to a cooling rack and let the bread cool down completely before slicing.
Video
Notes
- It is essential to use a fed, bubbly and active sourdough starter when mixing the dough ingredients so the bread can rise and ferment properly. I recommend feeding your starter about 4-8 hours prior to making the dough. I usually feed my starter early in the morning and make my dough after lunchtime, but if you are not at home during the day, then feed the starter the night before and make your dough the next morning. Then it can ferment during the day.
- The tricky part of making sourdough bread is knowing when the bulk fermentation is done since it varies depending on the ambient temperature. Usually, I let my sourdough ferment for about 5-7 hours. If your dough is colder and/or your house is chilly, then you might need to ferment for longer. A subjective way to know when it is ready is that the dough should be bubbly, become wiggly if you shake the container and it has risen in the dish.
- To help my bread rise when baking (called the oven spring), I like to place a few ice cubes between the Dutch oven and the parchment paper. This creates a little extra steam that helps keep the crust softer for longer while baking, promoting a better rise of the loaf.
- Nutrition: please note that the nutritional information is an estimate per serving provided for informational purposes only (calculated by software) and accuracy is not guaranteed. Consult with your healthcare provider or a registered dietitian if you need precise nutrition calculations for health reasons.

Leave a Reply