
Here is an incredibly simple bread recipe if you have a super busy schedule: easy no-knead sourdough bread! It is SO easy and fast to make the dough, with no kneading or stretching required, and the result is a soft bread that has an ultra-chewy bite and a tender crust. This is a basic recipe for an amazing everyday homemade sourdough bread, perfect for the beginner!

Here is a really easy homemade sourdough bread recipe perfect for the beginner! This is a no-knead, no stretches and folds and no scoring recipe that will get you started with the basic skills for making sourdough bread. Or, it will become your favorite go-to bread recipe if you have a busy schedule and don't have time to work on the dough for hours. Plus, you have the option of either 1- making it all on the same day, or 2- preparing the boule, leaving it in the fridge overnight and baking it the next morning.
This is truly the easiest sourdough bread ever!
Normally I make a "regular" rustic light whole wheat sourdough bread or choose to go for a same-day white sourdough boule. Or even I'll often make a 100% whole wheat sourdough bread when I need something hearty and ultra-healthy. But when life is chaos and all I can do is combine the dough and have no time for more before I have to hit the door, then this fast and basic no-knead sourdough bread recipe comes in very handy!
I have made it many times and it is always perfect: the crumb is SUPER chewy and soft with a more tender crust than most sourdough bread recipes. Also, not scoring the dough makes it easier if you are just getting started with making your own sourdough bread, but also, letting it open on its own as it bakes gives the loaf such a beautiful rustic look!
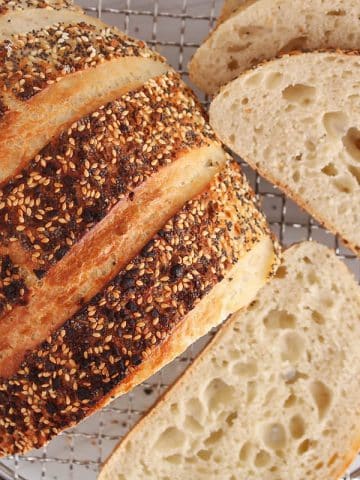
Also check out this everything bagel sourdough bread that's similar but with more savory flavor!
Let me know if you give it a try! ❤️
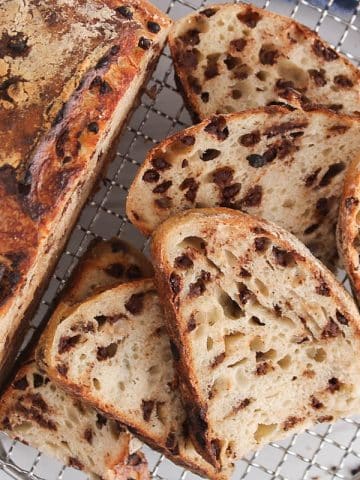
Looking for a sweet breakfast sourdough recipe? Check out this maple sourdough bread and this chocolate sourdough bread!

Jump to:
❤️ Why you will love this recipe
- Easy and fast, the perfect bread for the beginner!
- Minimal hands-on steps: mix the dough and leave it to ferment, no kneading!
- Amazing chewy bite and it has the perfect amount of sourness
- Slightly lower hydration to help with manipulating and shaping the boule
- Beautiful rustic look
- Versatile bread for sandwiches, stews, soups and to freeze
🍞No yeast easy sourdough bread
Traditional sourdough bread uses the wild yeast from a sourdough starter to rise the bread, no need to use commercial dry yeast!
The wild yeast slowly ferments the bread and breaks down the gluten from the flour, a process that creates little pockets of gas that get trapped within the gluten network. This is what makes your naturally leavened bread rise!
Sourdough starter also contains a healthy gut-friendly microbiome featuring acid lactic bacteria, which flavor the loaf with that delicious tangy taste we all love so much.
The fermentation process also reduces the amount of phytic acid naturally found in grains, making sourdough bread easier to digest and packed with readily available nutrients much easier to absorb.
➡️ To wrap it all up, compared to commercial bread made with dry yeast, homemade sourdough bread is:
- Easier to digest
- Higher in easy-to-absorb nutrients
- Much more flavorful
- Better in texture
🥖How does no-knead sourdough bread work
Normally, making homemade sourdough bread implicates some stretches and folds or kneading the dough to help work the gluten from the flour and ensure that the bread has a great texture (a more complex gluten network from kneading helps trap those yeast-forming bubbles).
That being said, the gluten network in the loaf can be strengthened also by allowing a proper fermentation time!
In this case, since we are not going to manipulate the dough much by kneading or stretching, we are going to allow the dough to go through an AUTOLYSE first.
Autolyse is when you mix flour + water only, then let these ingredients sit for 1 hour. This allows the flour to be fully hydrated before incorporating the sourdough starter and salt. This means that the dough requires less manipulation to reach a strong gluten network.
Also, when combining the dough, I recommend mixing for a few extra minutes to ensure all the ingredients are combined properly.

🍽 How to make it
⭐️ See below in the recipe card for the full detailed recipe!
Autolyse
First, weigh and combine the flour and water in a large bowl. Mix very well until there are no dry spots of flour. Cover well and let the flour hydrate for at least 30 minutes, but ideally 1 hour.


Mix the dough
Add the sourdough starter and salt to the hydrated flour, then combine. It is a bit tricky to bring the dough together after the autolyse, and I think it works better using your hands so you can really incorporate the starter in the flour mix. This should take 5-10 minutes.


Bulk fermentation
Once the dough looks shaggy but uniform, then cover well and let it ferment for 5-7 hours at room temperature (ideally in a cozy spot). The dough should rise and become "puffy" but won't necessarily double.
Shape + Final proof
Transfer the dough over a very lightly floured counter and use your hands to roughly shape the shaggy dough into a ball. To do this, I like to gently stretch the edges and bring them back into the center of the dough, then flip the dough so the seam side is on the counter. Cover and let it rest for 20-30 minutes.
Flip the dough so the seam side is back up and shape it as you wish. To shape in a boule: roughly shape into a square by stretching the dough, then fold the top part and each side over the center of the square. Grab the top part and roll towards you until the seam is on the counter. Use both hands to help shape it into a boule. Strengthen the boule by dragging it on the counter towards you a few times (see video).
Gently transfer the boule over a generously floured proofing basket (use a counter scraper) with the seam side up. Seal the seam if needed, cover and transfer into the fridge.


Bake
Transfer a Dutch oven baking dish to your oven and preheat to 450º.
Once the oven is very hot, then take the proofed dough out of the fridge, gently flip it over a large parchment paper and pull on the edges of the paper to transfer the dough into the preheated Dutch oven.
Cover and bake for 30 minutes. Then, uncover and bake for 5-7 minutes extra or until nicely golden brown.
Once done, cool down for 1-2 hours (at least) and enjoy!


💡 Baking tips
- If you have an electric mixer, then use it! You can mix the dough for 5-7 minutes before the autolyse and after adding the starter and salt.
- The fermentation time will vary depending on the temperature of the mixed dough and the room, just something to keep in mind to help you plan. A warmer temperature speeds up the activity of the yeast, meaning a shorter fermentation time. In my case, I fermented for 5.5 hours. If your house is super warm, then it could take 4 hours or if it is colder, up to 7-8 hours.
- Signs that your dough is done fermenting: it is puffy, wiggles when moving the bowl, large bubbles over the dough and the surface of the dough might be shaped like a dome.
- I highly recommend doing an overnight final proof once you shape the dough. This will allow better fermentation, especially important in this no-knead recipe. Cold proofing your dough also helps have a better oven spring while baking.
- For this recipe, I skipped scoring the dough to make it more simple and allow for a more rustic look. But, feel free to score if you prefer!
- As seen in the video, I like to add a few ice cubes in between the Dutch oven and the parchment paper: this creates more steam to keep the surface of the dough moist for longer and allow the bread to rise better.

❗️Storage tips
First, make sure to let the bread completely cool down before slicing or you risk ending up with a gummy crumb.
Keep the loaf flipped on its sliced surface on the cutting board for 24-48 hours. For longer storage, you can transfer it to an airtight container (this will soften the crust).
You can also freeze sourdough bread, the best way to store it long-term!
This sourdough bread storage guide will give you more tips on how to keep your bread fresh for longer!

🌱More homemade sourdough bread recipes to try
- Sourdough quinoa bread
- Herbed sourdough onion bread
- Blueberry sourdough bread
- Sourdough sandwich rolls
- Sourdough buckwheat bread
- Sandwich bread with discard
- Chocolate sourdough bread
I hope you enjoyed this easy no-knead sourdough bread recipe! If you have any questions, please leave them in the comment section below. Your feedback is so helpful!
Let's stay in touch with Instagram, Pinterest and Facebook. Also, don't forget to subscribe to my newsletter to be sure not to miss anything.
📖 Recipe

Easy Sourdough Bread for Beginners (No knead, No Stretch)
Ingredients
- 100 g sourdough starter 100% hydration
- 325 g water
- 500 g bread flour
- 10 salt
Instructions
- In a large bowl, add the flour and water, then mix well. Let the mixture rest for 30-60 minutes (this is called autolyse).
- Then, add the sourdough starter and salt, and mix well. It is easier to mix using your hands at this point, and keep mixing until shaggy but uniform, about 5-10 minutes.
- Cover well and let the dough ferment for 5-8 hours or until the dough is puffy, wiggles when you move the bowl and has nicely risen (although not necessarily doubled).
- Transfer the dough over a lightly floured surface and preshape into a ball (I like to grab the edges and bring them back over the center of the dough, then flip so the seam side is on the counter). Cover and let it rest for 20-30 minutes.
- To shape the dough into a boule: flip the dough so the seam side is back up, stretch the dough to roughly shape a square, fold the top part and both sides over the center of the square and then grab the top part to roll it toward you until the seam side is on the counter (watch the quick video below!). Use both hands to help shape it into a boule. Strengthen the surface by grabbing the boule and dragging it on the counter towards you a few times.
- Transfer the dough to a floured proofing basket, cover and transfer to the fridge. Do a final cold proof overnight (7-12 hours).
- At least 30-60 minutes before you want to bake the bread: transfer the Dutch oven to your oven and preheat to 450ºF. When ready to bake the bread: take the proofed dough out of the fridge, flip over a large piece of parchment paper and grab the edges of the paper to transfer over the preheated Dutch oven.
- Bake covered for 30 minutes. Then, remove the cover and bake for 5-7 extra minutes or until golden brown.
- Let the bread completely cool down before slicing.
Video
Notes
- This is a no-knead and no-stretch easy sourdough bread, so an autolyse step (resting time of flour + water mix) allows the flour to be well-hydrated before incorporating the starter and salt. Also, make sure to mix for long enough the dough before starting the fermentation to ensure the ingredients are well combined.
- Temperature affects fermentation time: warmer = shorter vs colder = longer fermentation time. This is something you can play with depending on your schedule. In my case, I did a fermentation time of about 5.5 hours.
- Signs that tell you the dough is done fermenting: puffy, wiggles when moving the bowl, dome shape over the dough, maybe a few large bubbles over and the dough has risen (although not necessarily doubled).
- I did not score this dough to make it easier for the beginner and also, it gives a beautiful rustic look to the loaf.
- This open-bake method guide will show how you can bake your sourdough bread without a Dutch oven.
- To keep your sourdough bread fresh for longer, I recommend simply keeping the loaf flipped over your cutting board with the sliced part down. For longer storage, you can pre-slice the loaf and freeze it.
- Nutrition: please note that the nutritional information is an estimate per serving provided for informational purposes only (calculated by software) and accuracy is not guaranteed. Consult with your healthcare provider or a registered dietitian if you need precise nutrition calculations for health reasons.

Anonymous says
Amazing recipe, so easy and quick!
jessica says
Great, glad you liked! 😊
Tiki says
I'm anxious to make this, I'm not sure how to obtain 100% hydration when using cold sour dough discard?
jessica says
Hi Tiki! 100 % hydration simply means that the starter is fed with equal amount of flour + water. For exemple, when I feed my starter, I usually use 50g starter + 50g flour + 50g water. Hope this is helpful!
Malika says
Hi! Does that starter need to be at peak for this recipe?
jessica says
Yes! 😊